Pantone Tritone Postcards

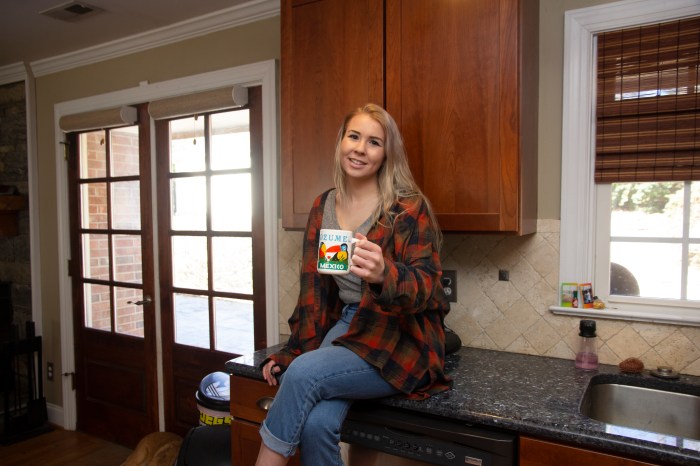
In my most recent project in Illustrative Imaging we were told to take four photos that focused on color and had a theme connecting them. I chose to take photos in the city of Raleigh, NC where I live. The theme for my photos was street photography / urban scenes. Below are the four original photos I took and chose to use for this assignment:

I thought these were the most colorful that I had taken and so would work well for this assignment. The next step was to take these photos and do color studies on them. I used the Adobe Color Wheel (you can find it here) to help me do this. After logging in with my Adobe ID on the site, I then clicked “import image” and uploaded each of the images to get a color scheme from them. The automatically chosen colors were not the best, so I had to adjust some of the points on the image where it was pulling color from until I got a result that I liked. I then clicked “save color theme” for each of the themes I created using the images, so that they would be saved as swatches in my Adobe Creative Cloud account – this way I could access them across all platforms.

In order to find the Pantone matches of the colors I chose, I visited Pantone’s website and searched each color from my color theme’s by their “HEX” number in the Pantone search feature. By doing this I was able to find Pantone colors that most closely matched the colors I had chosen for my color themes using the Adobe Color Wheel.

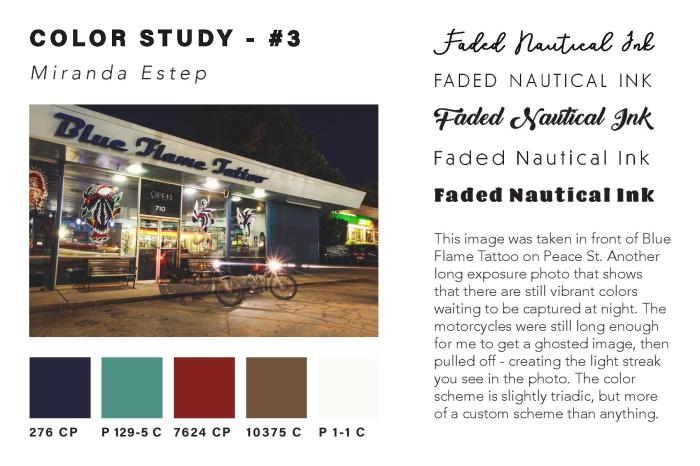
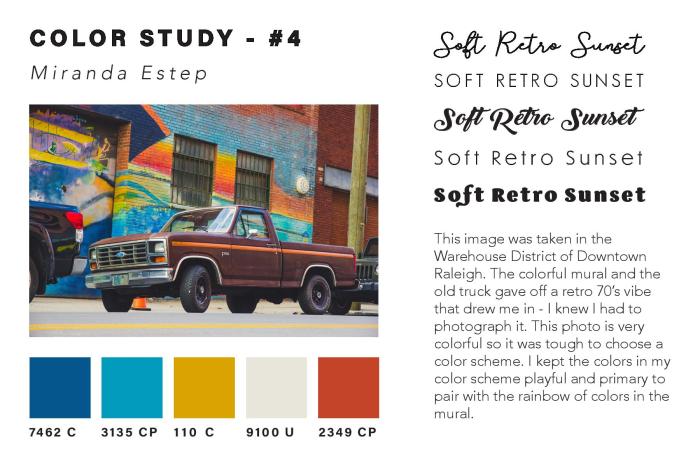
Once I had all of the Pantone names for my colors, I added them as swatches in my color study document underneath each of my photos. I then created a title for each of my images in five different fonts to see what font fit best with the image. I also wrote a description for each image, describing my concept and why I chose it. You can see the finished color study document below:

Estep-Colorstudy-page-001Estep-Colorstudy-page-002Estep-Colorstudy-page-003Estep-Colorstudy-page-004 
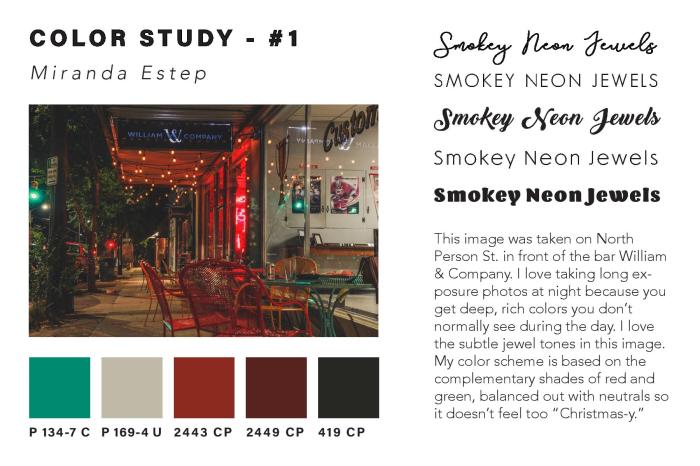
After creating the color study for each image and assembling it into one InDesign
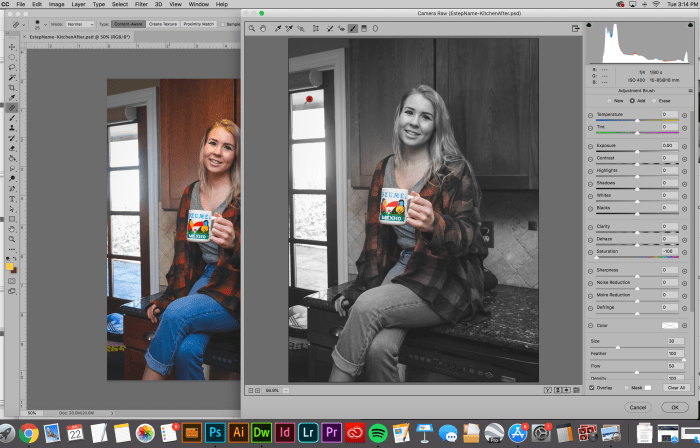
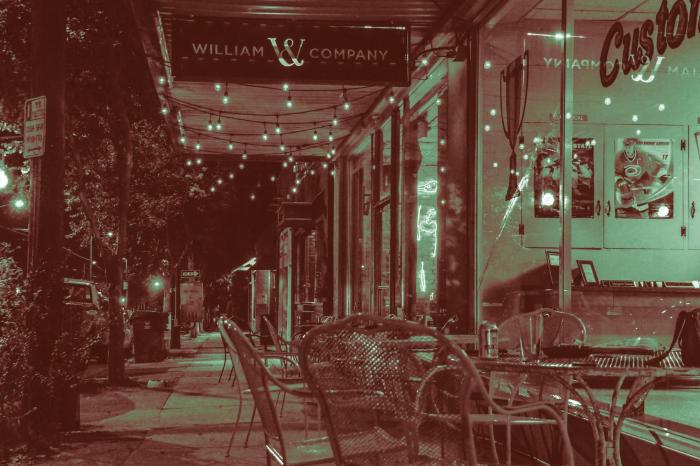
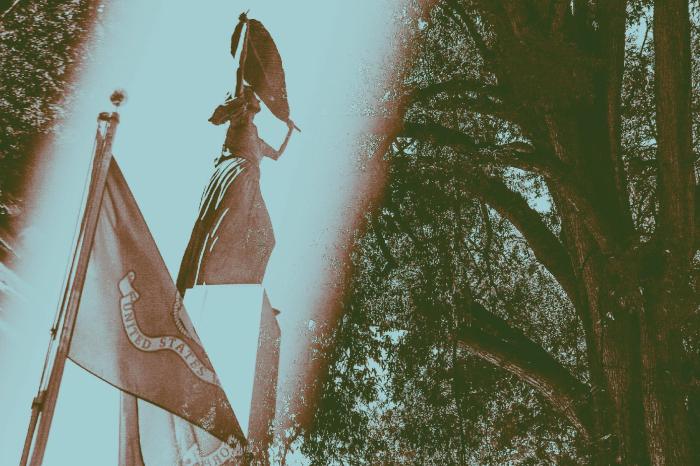
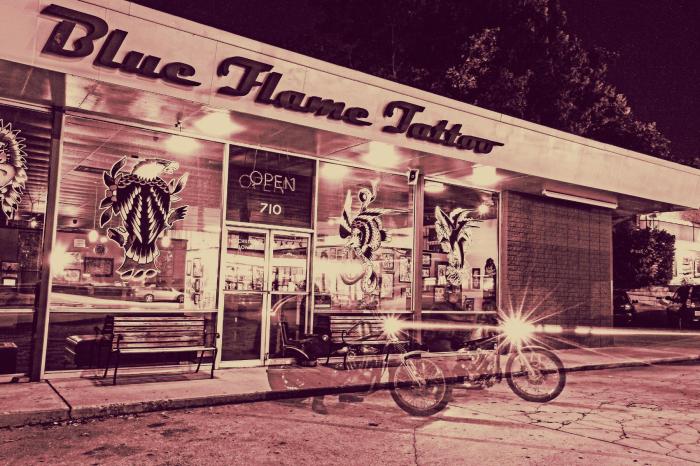
document, I then created Tritone images using my images and the Pantone swatches I chose during my color study. I used this Lynda.com video tutorial to create the tritone images. During the process I discovered that some of the original color swatches I chose were not showing up well together as a duotone or tritone image. Because of this, I chose different Pantone Coated color swatches for all of my images. I chose colors that were close to the original color swatches, but showed up clearly in the tritone image. My goal for the tritone image was to be able to distinguish each of the three color swatches individually. This way each color swatch added something to the image and was not lost to the viewer.

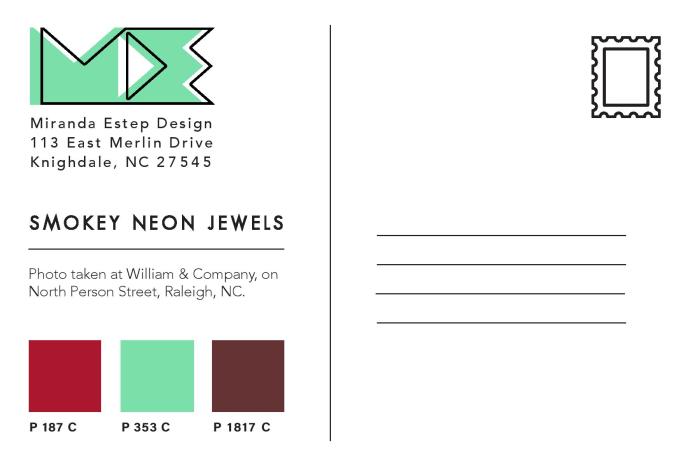
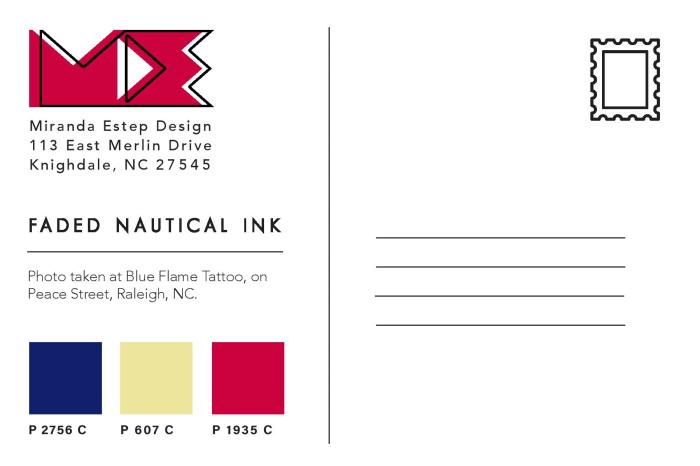
Below are all three of my final tritone images as postcard designs, featuring the three Pantone Coated swatches on the back and my personal logo, Miranda Estep Design, in the color of one of the swatches.

Estep-Miranda-Pantone-1-2-3-page-001Estep-Miranda-Pantone-1-2-3-page-002Estep-Miranda-Pantone-1-2-3-page-003Estep-Miranda-Pantone-1-2-3-page-004Estep-Miranda-Pantone-1-2-3-page-005Estep-Miranda-Pantone-1-2-3-page-006
I really enjoyed this assignment because it challenged me as a photographer as well as a designer. I learned a lot about Pantone colors that I had not previously known and it gave me a new level of respect for Pantone. I would highly suggest any designer experiment with this assignment themselves.

“Portraits with Purpose” Social Media Ads

This week is a continuation of my last project in Illustrative Imaging, in which we took three portraits and created a social media campaign concept that would tie them together. This week we added a text “tagline” and a “call to action” button. My concept for these portraits was building on the #metoo campaign and the controversy it sparked. My portrait series and social media campaign is in response to the doubt and backlash women received after coming forward to report sexual assault. My campaign is an answer to those who ask “Who are all these women coming forward with allegations?” well, “It was her.”

For this series, there are three images of women so I decided to use a different phrase for each, which were the following: “It was her” “It was you” and “It was me.” They each draw attention to the fact that there are many individuals out there who have been sexually assaulted that are not making false allegations.

Each portrait will link the viewer to an interview with each sexual assault victim and will ask for a donation to the #metoo charity fund that goes towards the aid of sexual assault victims.

I did many sketches and variations of my design (included below) but I kept coming back to the idea of the women’s mouth or eyes being covered. The mouth or eyes being covered symbolizes the suppression of the woman’s voice and the blindness of society to the victims. So, I decided to use a technique from the “Bada** Photoshop Effects” book we are reading in class. In the book they use different layer styles to overlay text on images in interesting ways.

To create these images, I first made a red rectangular shape to go over the eyes and changed the layer style to “overlay.” I then put white text over the image and changed the text layer style to “difference.” I thought it was a very interesting effect. (Images below.)

Estep-Social03

Estep-Social02.jpg

Estep-Social01

Performing Basic Photo Corrections

Hello everyone! Today’s post covers my third week in Illustrative Imaging, an online course I’m taking at Wake Tech. The prompt was to take a portrait (self or otherwise) in a kitchen while holding a colorful mug. We were also instructed to leave overhead lights on in the kitchen, in order to give the photos a yellowish cast. The objective was to perform photo corrections on the photo using Photoshop’s RAW interface.

Below is my original image (shot in RAW, per the assignment):
estep-kitchenbefore

As you can see, there is a yellowish cast from the overhead lights, which needs to be fixed by changing the white balance. I also need to crop this image to frame the subject (me) better. I also need to do mild blemish correction on my skin and face. Because my lens is slightly wide angle, I will also need to use the built in lens correction feature of the RAW interface to correct the ‘bulging’ caused by lens distortion. The contrast of the photo could be changed as well to suite my preference. Finally, I will also use a few presets included in the RAW interface to make the photo more ‘flat’ and ‘matte’ which is a look I prefer in my photography.
Below is the final result of my editing using the RAW interface:

estep-kitchenafter

As you can see, this results in a much more pleasant photo.  Below are the before and after side-by-side so you have a better understanding of the changes:


The second part of the assignment was to use the correction brush to desaturate everything in the photo except the colorful mug. Below is a screenshot of me using the correction brush to accomplish this:

screen shot 2019-01-22 at 3.14.15 pm

The final result:

Estep-KitchenColor.jpg

Again, I’ll include the before and after below so you can really see the difference:


Overall, this exercise was a great introduction to the Photoshop RAW interface, which is something I’d previously ignored before, opting to edit all my photos in Adobe Lightroom instead. I look forward to learning more about what editing in Adobe Photoshop’s RAW interface has to offer and hope my fellow photographers out there give it a shot as well. Cheers,
– Miranda


Drawing Fundamentals – Weeks 3 & 4

Fall Semester is in full swing and with it comes work, work and more work. Luckily, I love what I’m learning and a lot of times it doesn’t feel like work, especially when it comes to my Drawing Fundamentals class.
These past few weeks we’ve been focusing on texture and proportion. Week 3 was an exploration of texture through imitation. Below are the 12 textures I imitated in my sketchbook.

estep-texture-page-001
On the surface this assignment seemed easy but was actually quite difficult. One of my biggest challenges as an artist and a designer is having patience, especially with repetitive tasks. This involved a lot of repetition, because the basis of texture is pattern and pattern is based on recognizable repetition. This exercise forced me to slow down my method and to really look at my subject when creating texture, rather than inventing what I think the texture looks like in my mind.

Week 4 we moved on to proportion. Our lecture focused on logos and how they are based on recognizable objects that have been simplified to their most simple forms. They are recognizable as the original object in huge part due to their proportion. Below are my initial 18 thumbnail sketches of a pepper for the assignment.

estep-scale-thumbnails-page-002estep-scale-thumbnails-page-001

The next step was to take 3 of your most interesting thumbnails and develop them further. Below are my 3.


Finally, you were to take 1 sketch of the 3 refined thumbs and draw it at the scale of a standard business card, as well as that of a standard letterhead. Below are my final drawings as well as the original object.

IMG_3324-2

estep-scale-bizcard-8.5x11-page-001estep-scale-bizcard-8.5x11-page-002

Interview with Chana Lynn – author of RaleighWhatsUp

You may not know Chana Lynn, but I’m sure you know her blog – RaleighWhatsUp. Chana’s blog is a trusted source of all things Raleigh – what to do, where to go and most importantly – who has the best eats!

27577310_1552732718155732_1358626476462702592_n
Photo from RaleighWhatsUp Instagram

Chana has lived in Raleigh for the past 16 years, so you know she’s an expert on the subject. I first stumbled onto her blog a few months ago when a friend of mine showed me the RaleighWhatsUp Instagram. Since then I always check Chana’s blog or Instagram whenever I’m searching for something new to do in my home city.

Because of her established authority of all things Raleigh on social media, I decided to make Chana the focus of an an assignment for my Social Media class. I sent her a few questions and she kindly obliged me – her answers are below.

What Social Media channels do you use related to your interest?

I use the following on a regular basis: Instagram (My favorite!), Twitter, Facebook, Pinterest, Blogger, Offline (local App), Cureat (another local App), Swarm and Untappd.

How much time do you spend each week on this Social Media Marketing?

That’s hard to say, I try to post or share on social 1-3x a day to IG/Twitter and post a blog update 1-3x a month. I guess per week its probably 5 hours or so a week. More if I’m doing more specific blog posts as an influencer or sharing an event that I’ve attended which could add 5-10 hours.

How do you engage visitors to participate and share their content?

I try to engage visitors by sharing/posting things that are current/relevant, something unique or new that they may not have known about around Raleigh or places we visit. I try to make the posts visually interesting to get them to stop and read and engage. Sometimes I might ask a question, often I will respond to questions and comments posted on my social. I often find that visitors/followers will tag their friends and family to make them aware of restaurants, shops, new openings in Raleigh and the Triangle, etc.

27877721_175071019783168_2257924419869474816_n
Photo from RaleighWhatsUp Instagram

How does this social media engagement benefit you?

I love hearing from followers that they go to RaleighWhatsUp to find out where to eat, dine, shop, etc. I love getting local Raleigh people to spend time in their local coffee shops, restaurants, breweries, boutiques etc and support their local business owners. I think being authentic and real helps to grow a local organic following and this in turn opens up work opportunities for me to do social media or website design for businesses, as well as opportunities to partner with local businesses or be a local influencer for different brands/hotels, etc.

How does this social media engagement benefit your audience?

I hope that it benefits my audience by highlighting all the great things about their city and helps them find out more about things they are interested in whether its art, food, drink, architecture, shopping, travel and more. I think people enjoy being in the know, especially about where they live. I hope it gets people out exploring and engaging with friends in cool places in and around Raleigh. Life is about experiences and the more people are out supporting small businesses and having great experiences the more exciting and better off Raleigh will be!

As you can see, Chana is well versed in social media and uses it to tell the story of the beautiful city of Raleigh, NC and it’s people. If you haven’t checked out RaleighWhatsUp, you’re missing out – Click here to view Chana’s blog.

Since discovering RaleighWhatsUp I’ve fallen even further in love with Raleigh and the surrounding area – Thanks Chana!

Comment below if you love the city of oaks & answer this: What do you think Raleigh needs more of?


gonza6
Photo from Chana’s “Fiesta de Camotes – Celebrating Sweet Potatoes at Gonza Tacos Y Tequila” Blog Post